

For partners A real situation
Someone new starts soon. Invite them with the right access.
Invite a team member, choose their role, services and location, and track the invitation until they join.
Recorded in a demo workspace. Narrated, with captions on.
Start the invitation
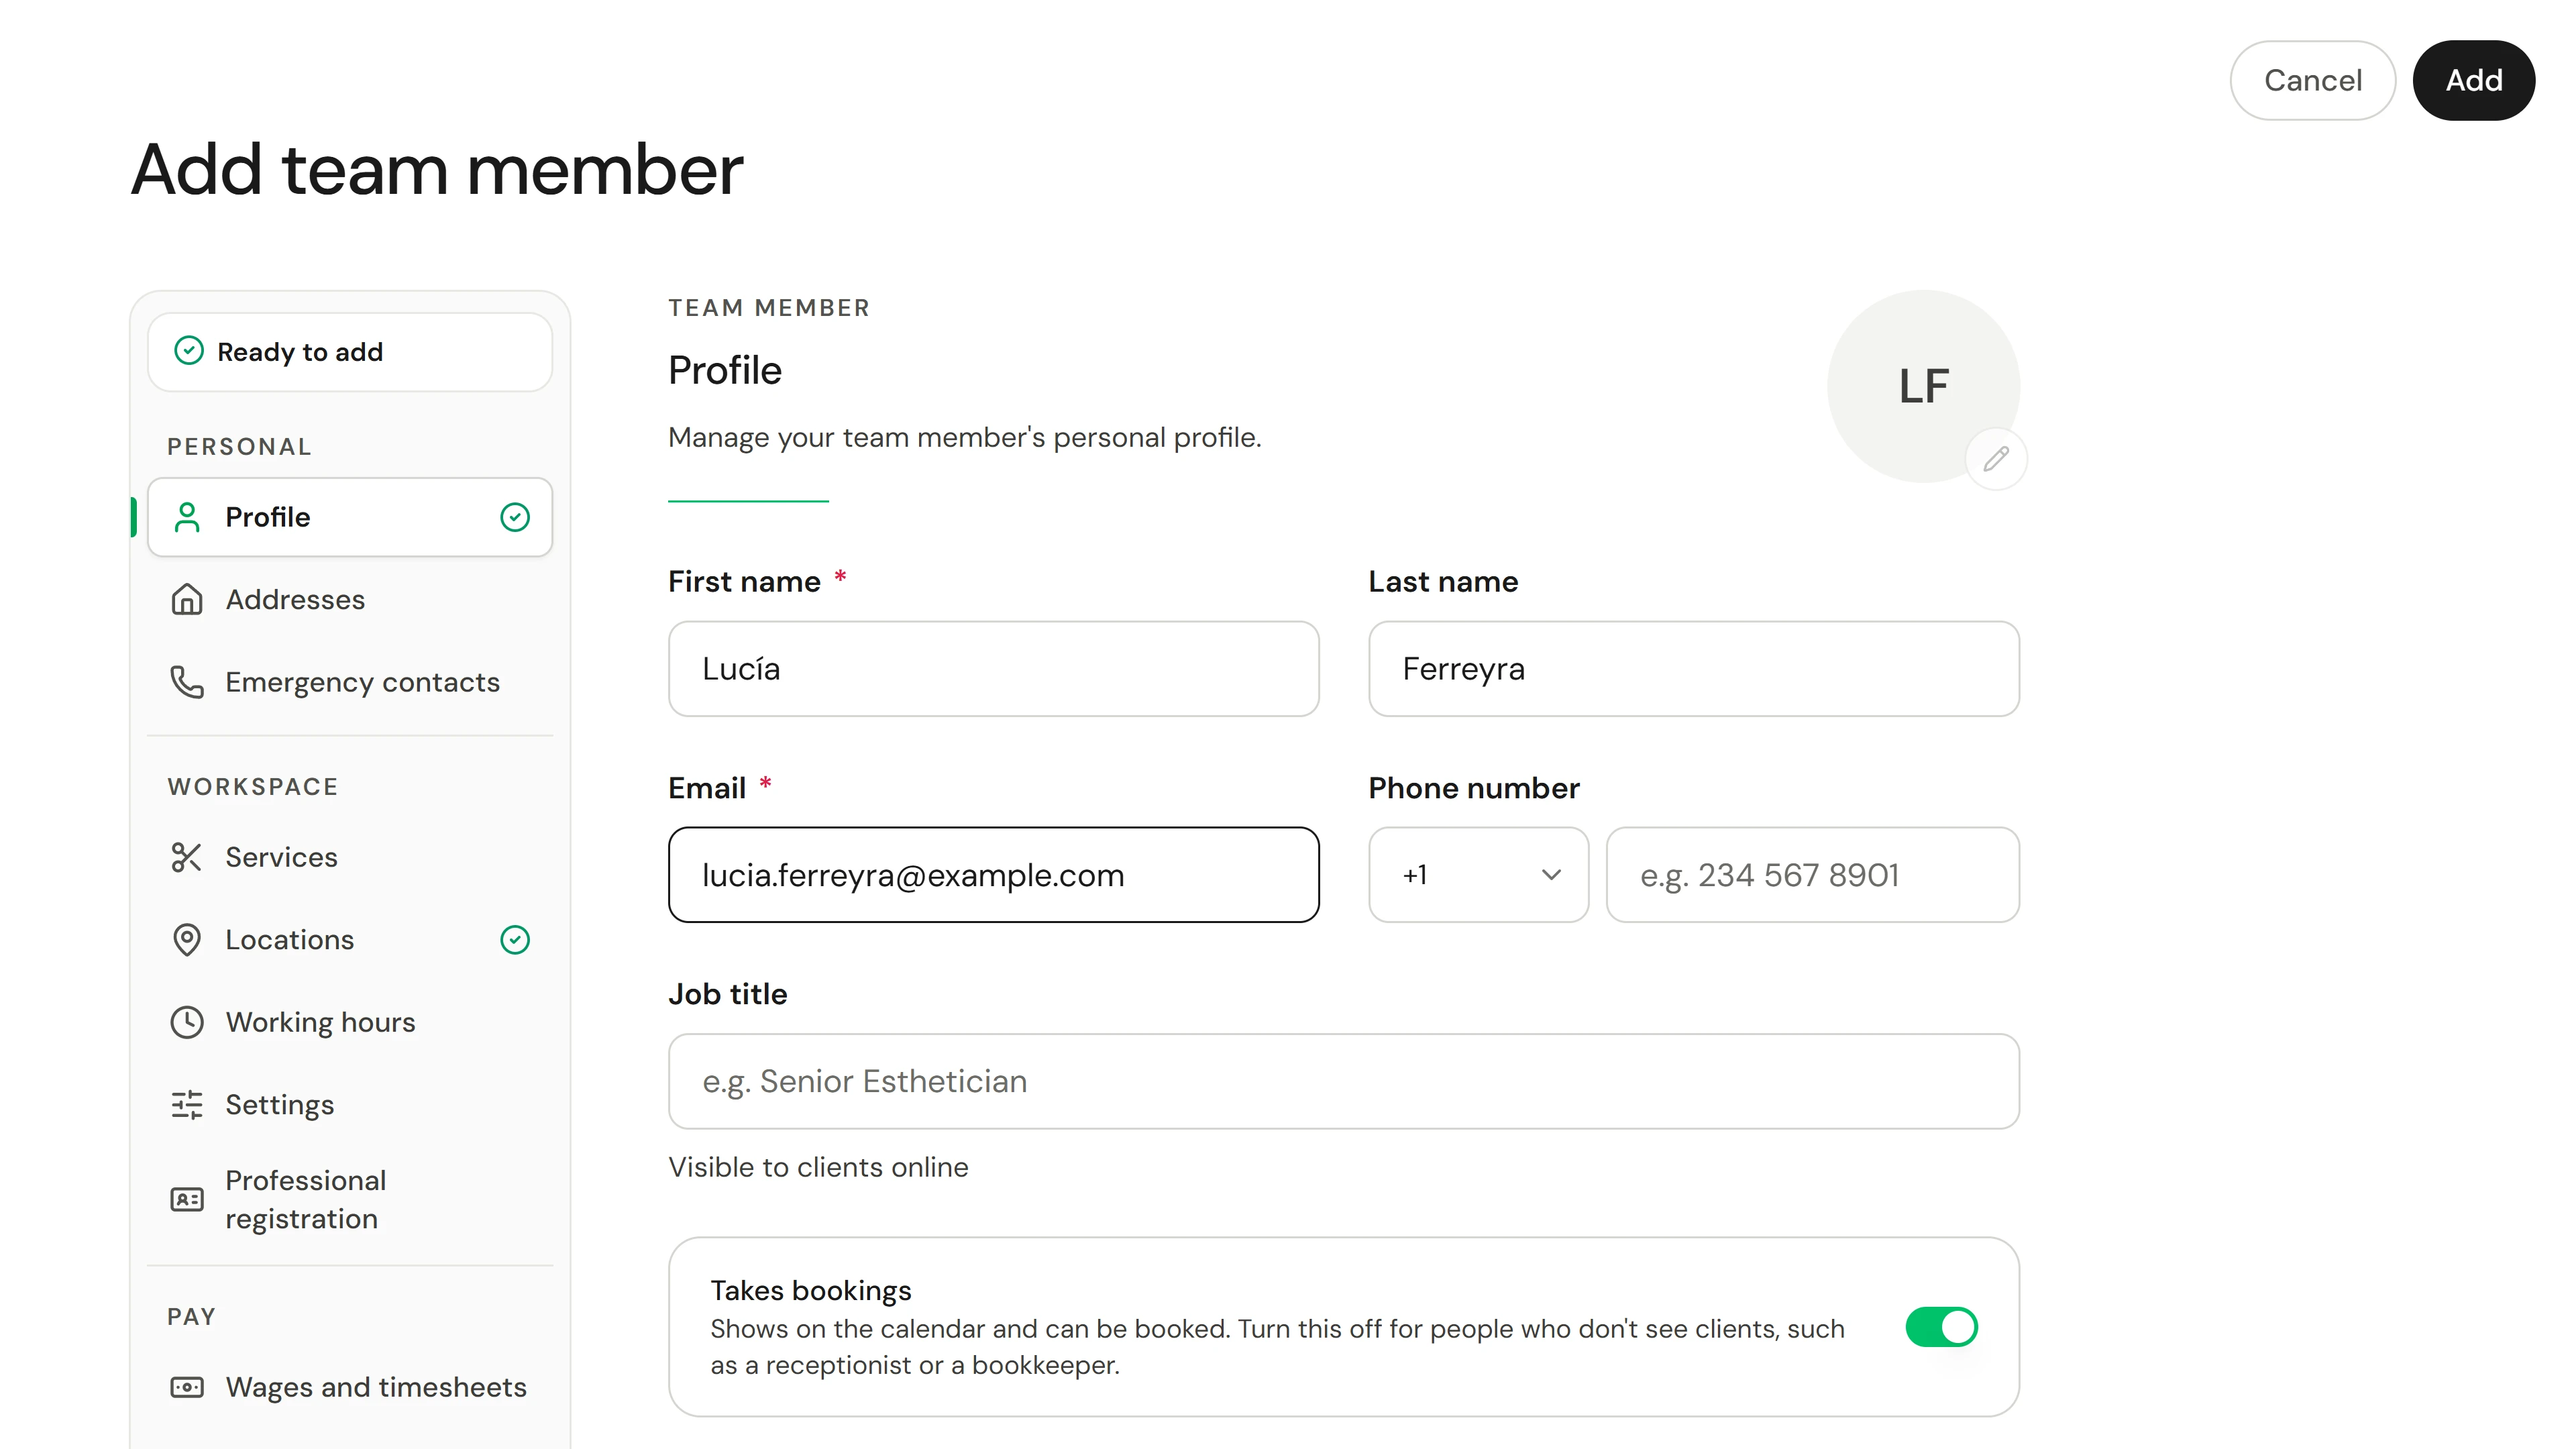
Open Team and choose Invite Team Member. Enter their first name, last name and email address. The list beside the form says what is still missing, and reads Ready to add once it has everything. Keep Takes bookings on if clients will book them, and turn it off for someone who doesn't see clients. With more than one location, also choose their Home location.
The situation
Put it into practice.
A new massage therapist starts next week. You want them to arrive with their own login, the right access, and a calendar clients can book.
What you will take away
A sent invitation with the right role, services and location, and you know where to resend or revoke it.
Before you start
Inviting needs admin or owner access. You can give a role with no more access than your own, and the Owner role is never given by invitation.
Keep in mind
The invitation link lasts seven days. Until they accept, the person shows as Invited and cannot be booked. Check the email address carefully, because the invitation goes to whoever reads that inbox.
Try the decision
Your new hire says the link has expired. What do you do?
Read the full walkthrough
1. Start the invitation
Open Team and choose Invite Team Member. Enter their first name, last name and email address. The list beside the form says what is still missing, and reads Ready to add once it has everything. Keep Takes bookings on if clients will book them, and turn it off for someone who doesn't see clients. With more than one location, also choose their Home location.
2. Choose their role
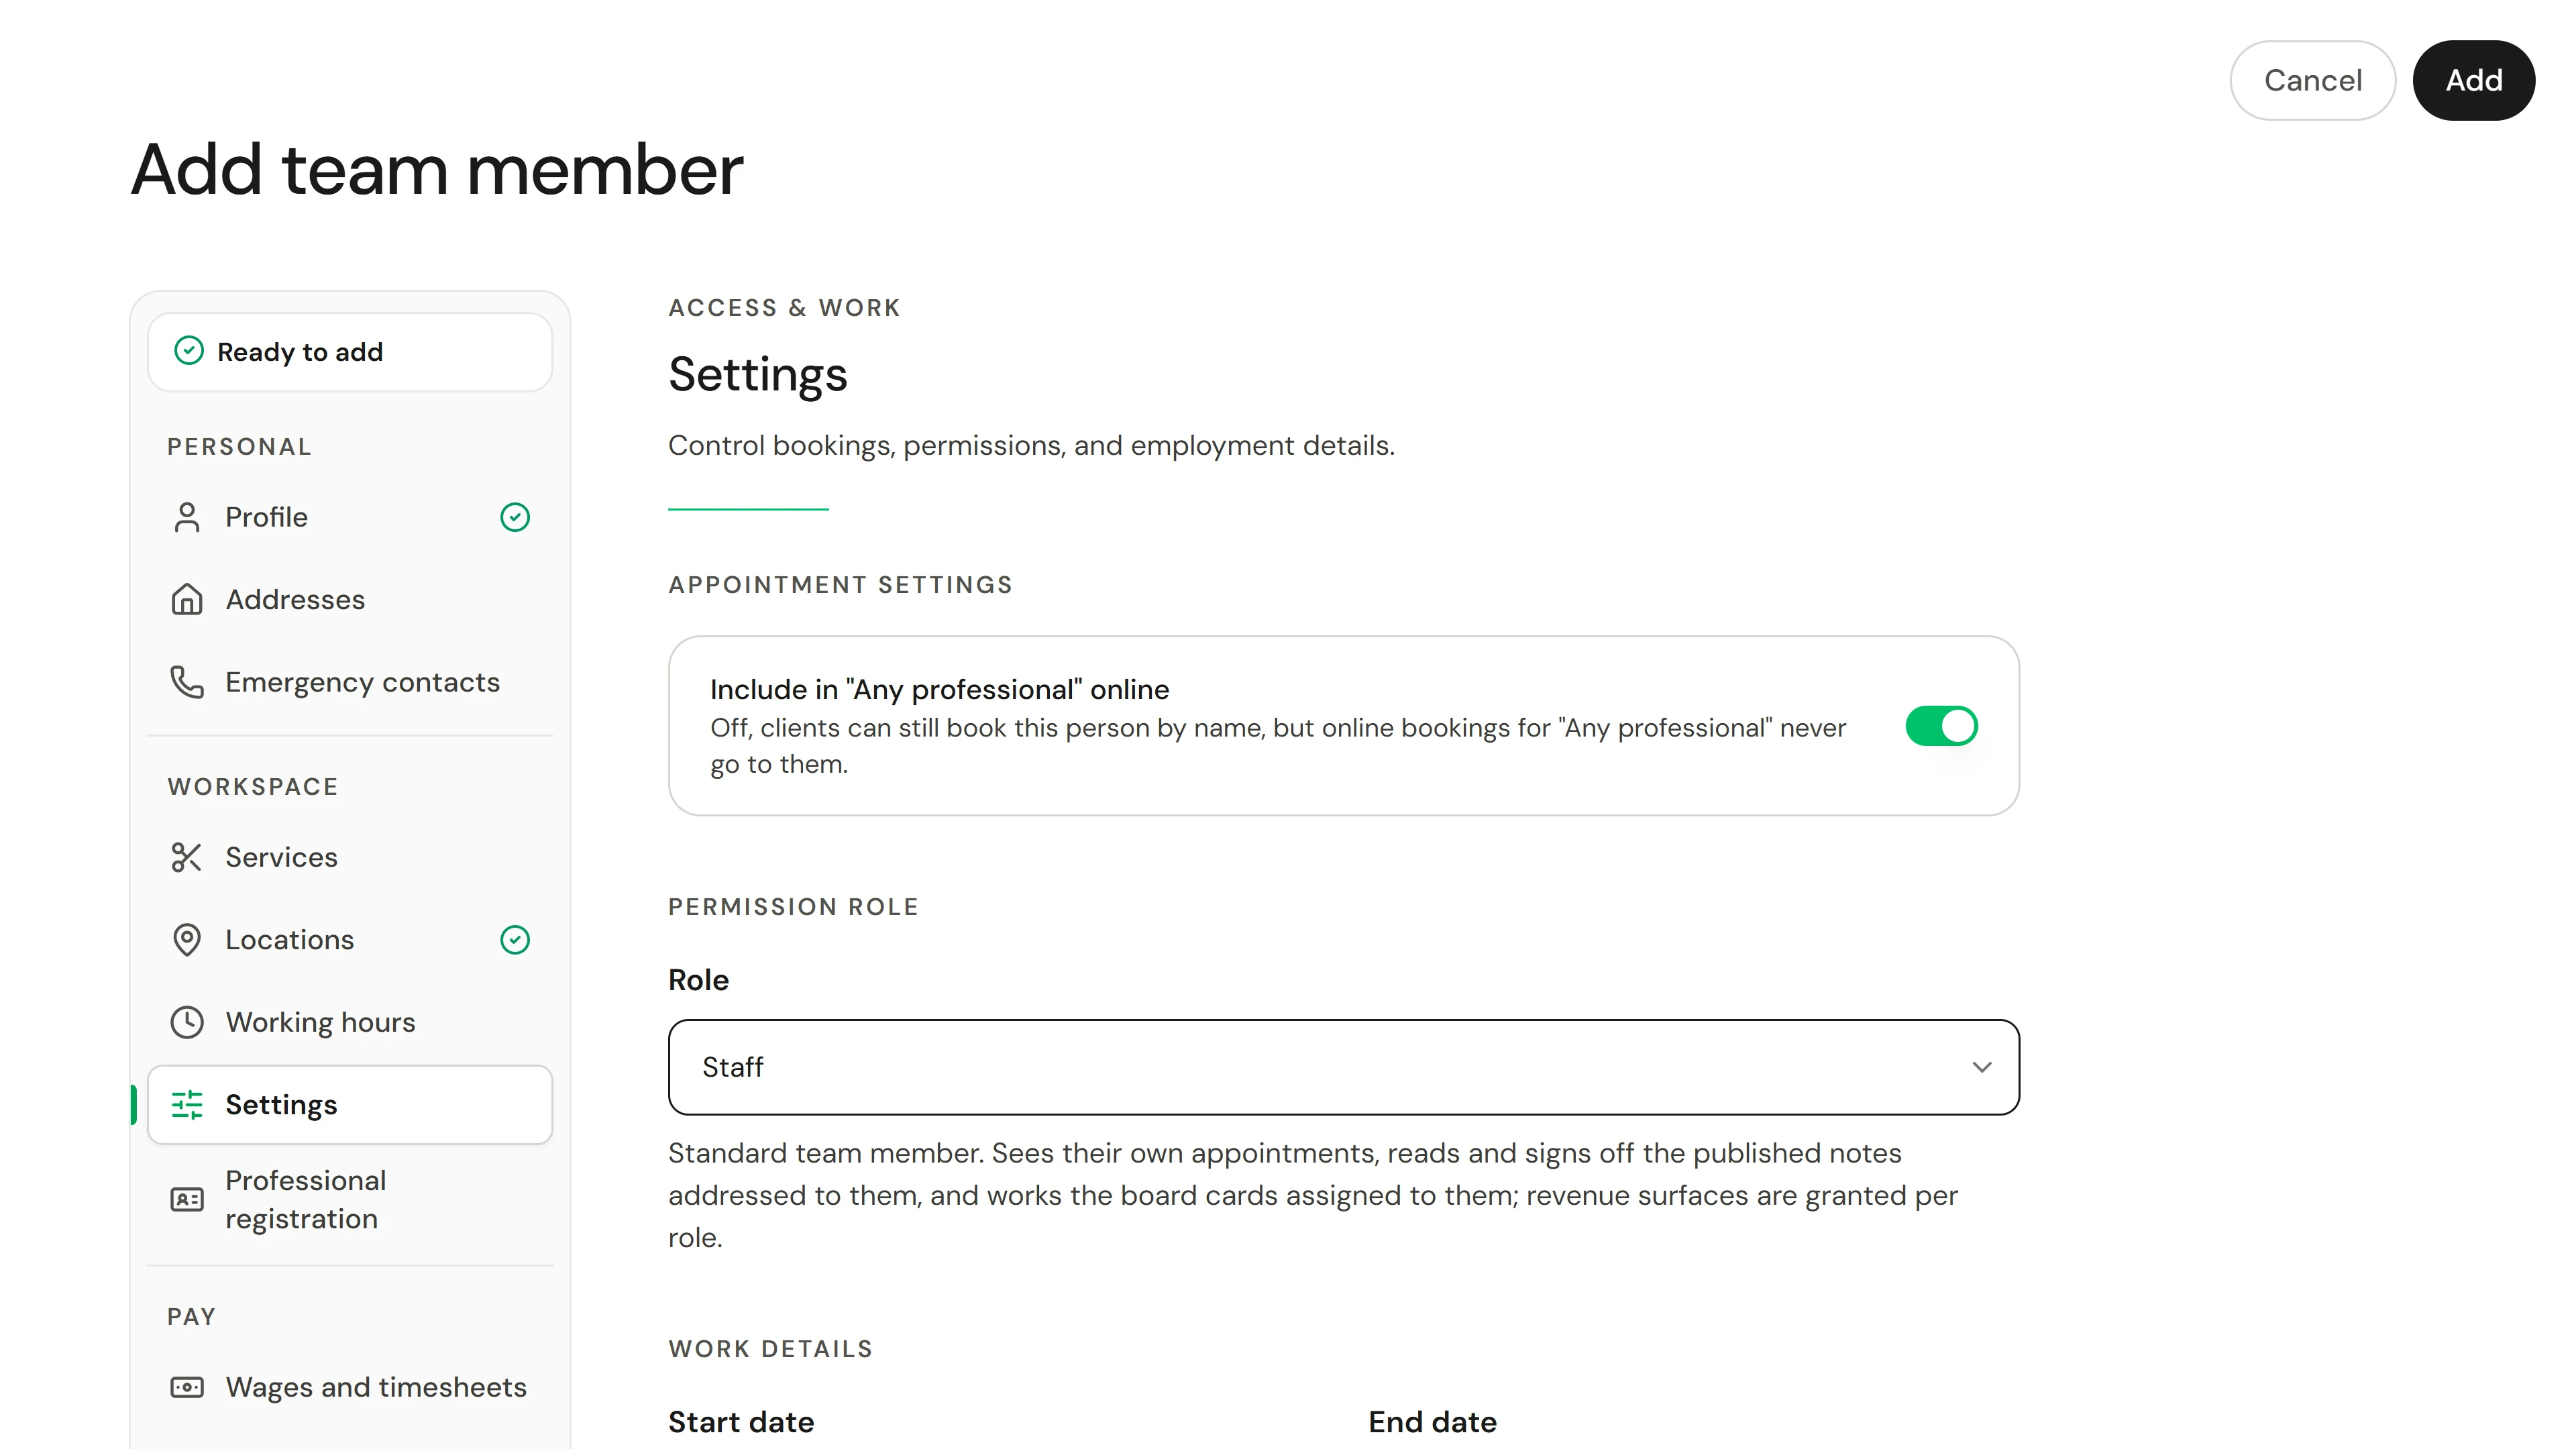
Open Settings in the panel's list and choose a permission role. The description under the role says what it can see and do.
3. Choose their services and location
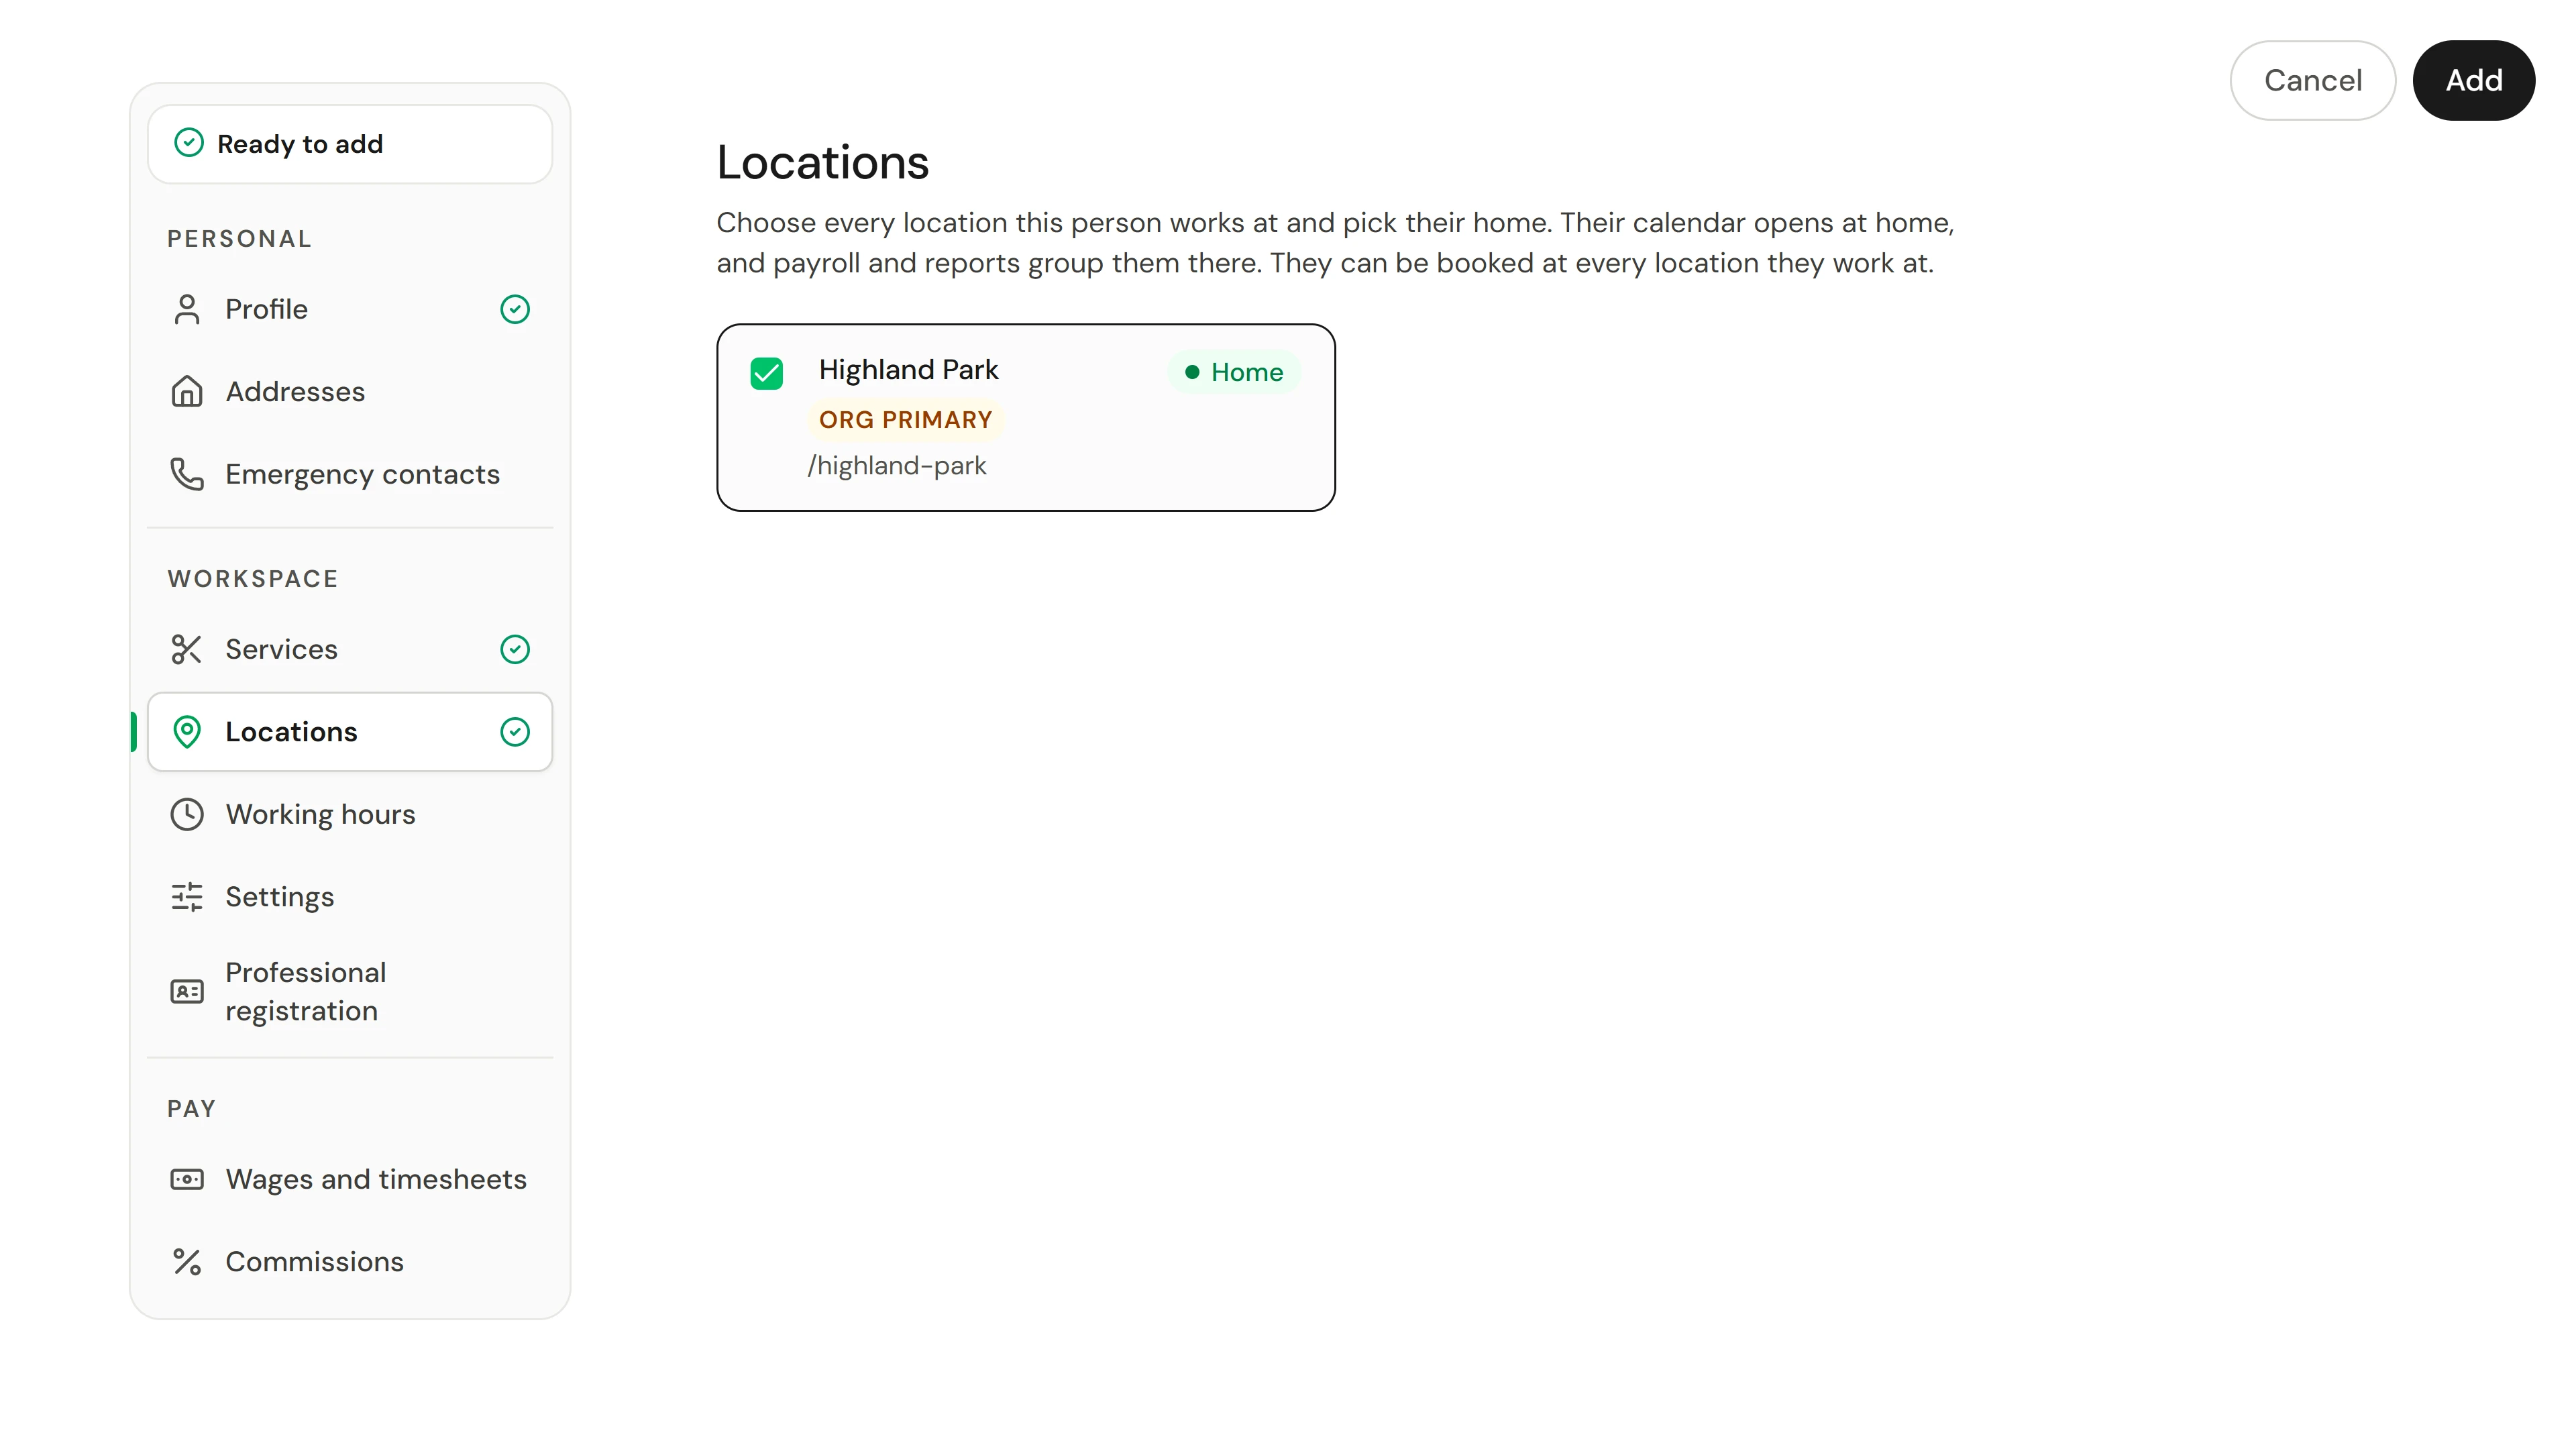
In Services, tick the treatments they perform. In Locations, check where they work; their home location is where their calendar opens. A business with one location has it ticked already.
4. Set their usual week
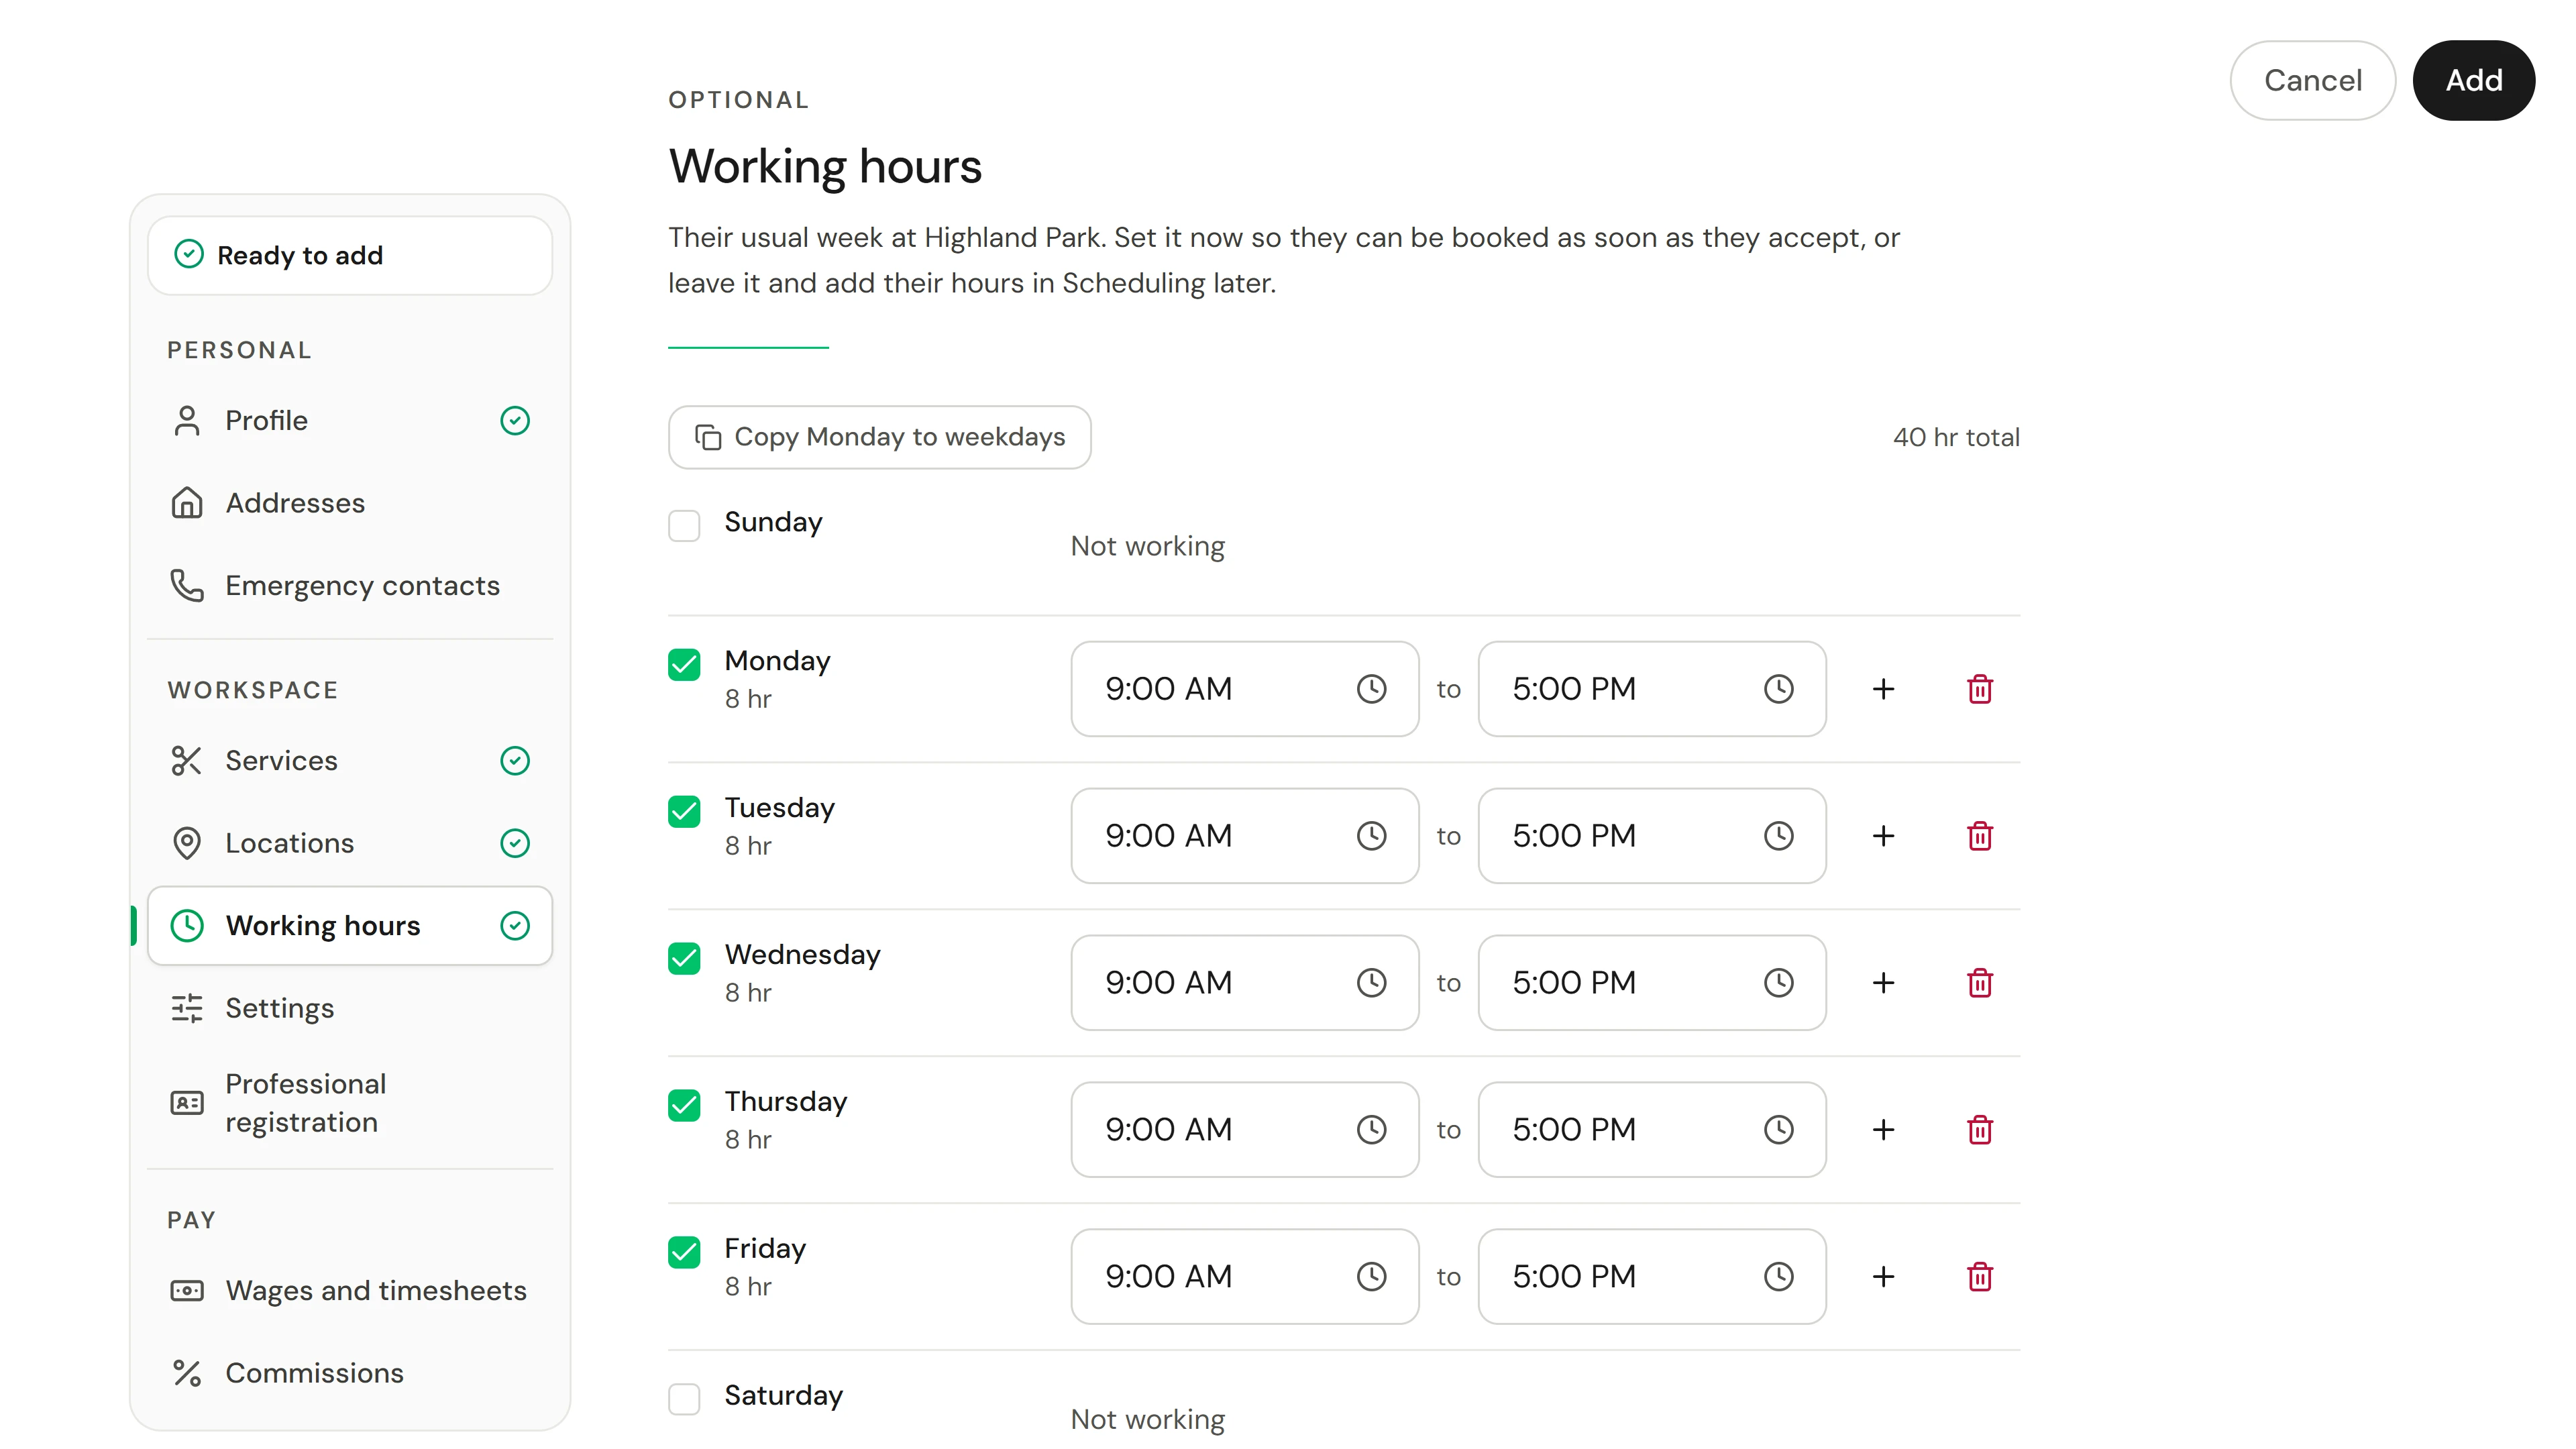
Working hours is optional. Tick Monday and check its times, then choose Copy Monday to weekdays to fill the rest of the week. The hours repeat every week from the day they accept, so clients can book them straight away. You can also leave it and add their hours in Scheduling later.
5. Send it, then track it
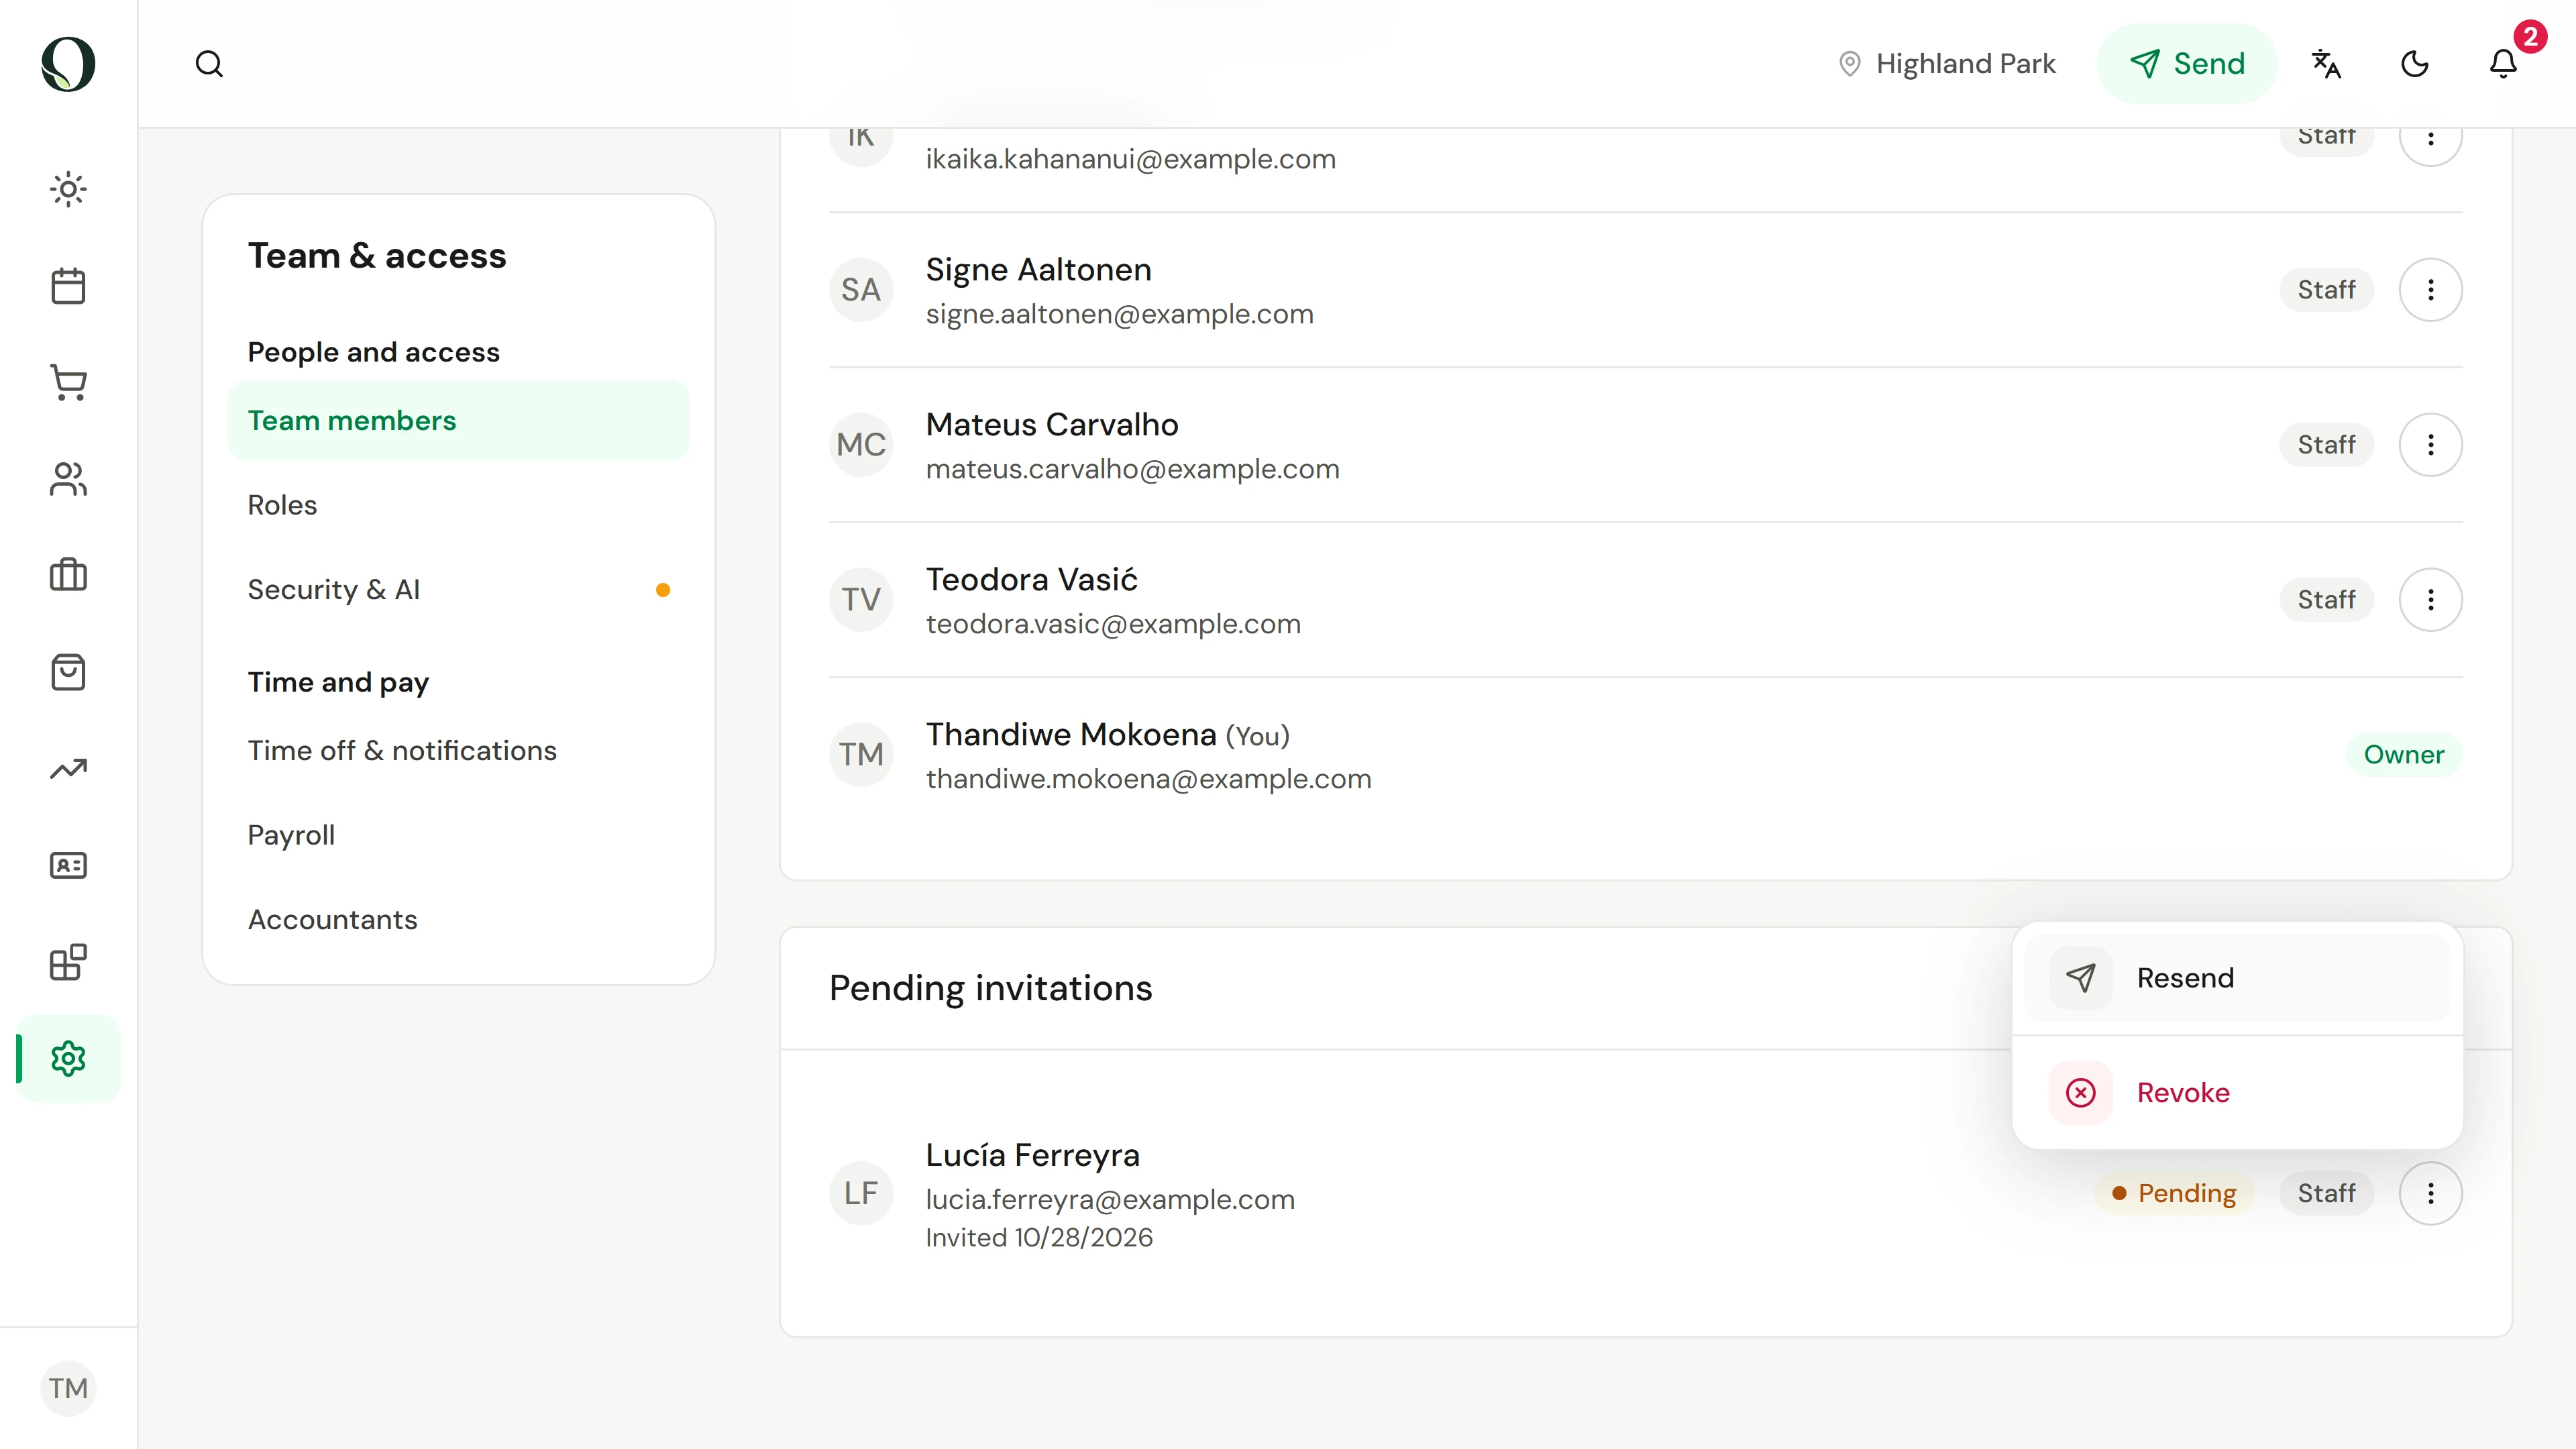
Choose Add to send the invitation. They appear in Team as Invited. Select them to open Pending invitations in Settings, where the actions menu can resend the link or revoke the invitation.
6. See what they receive
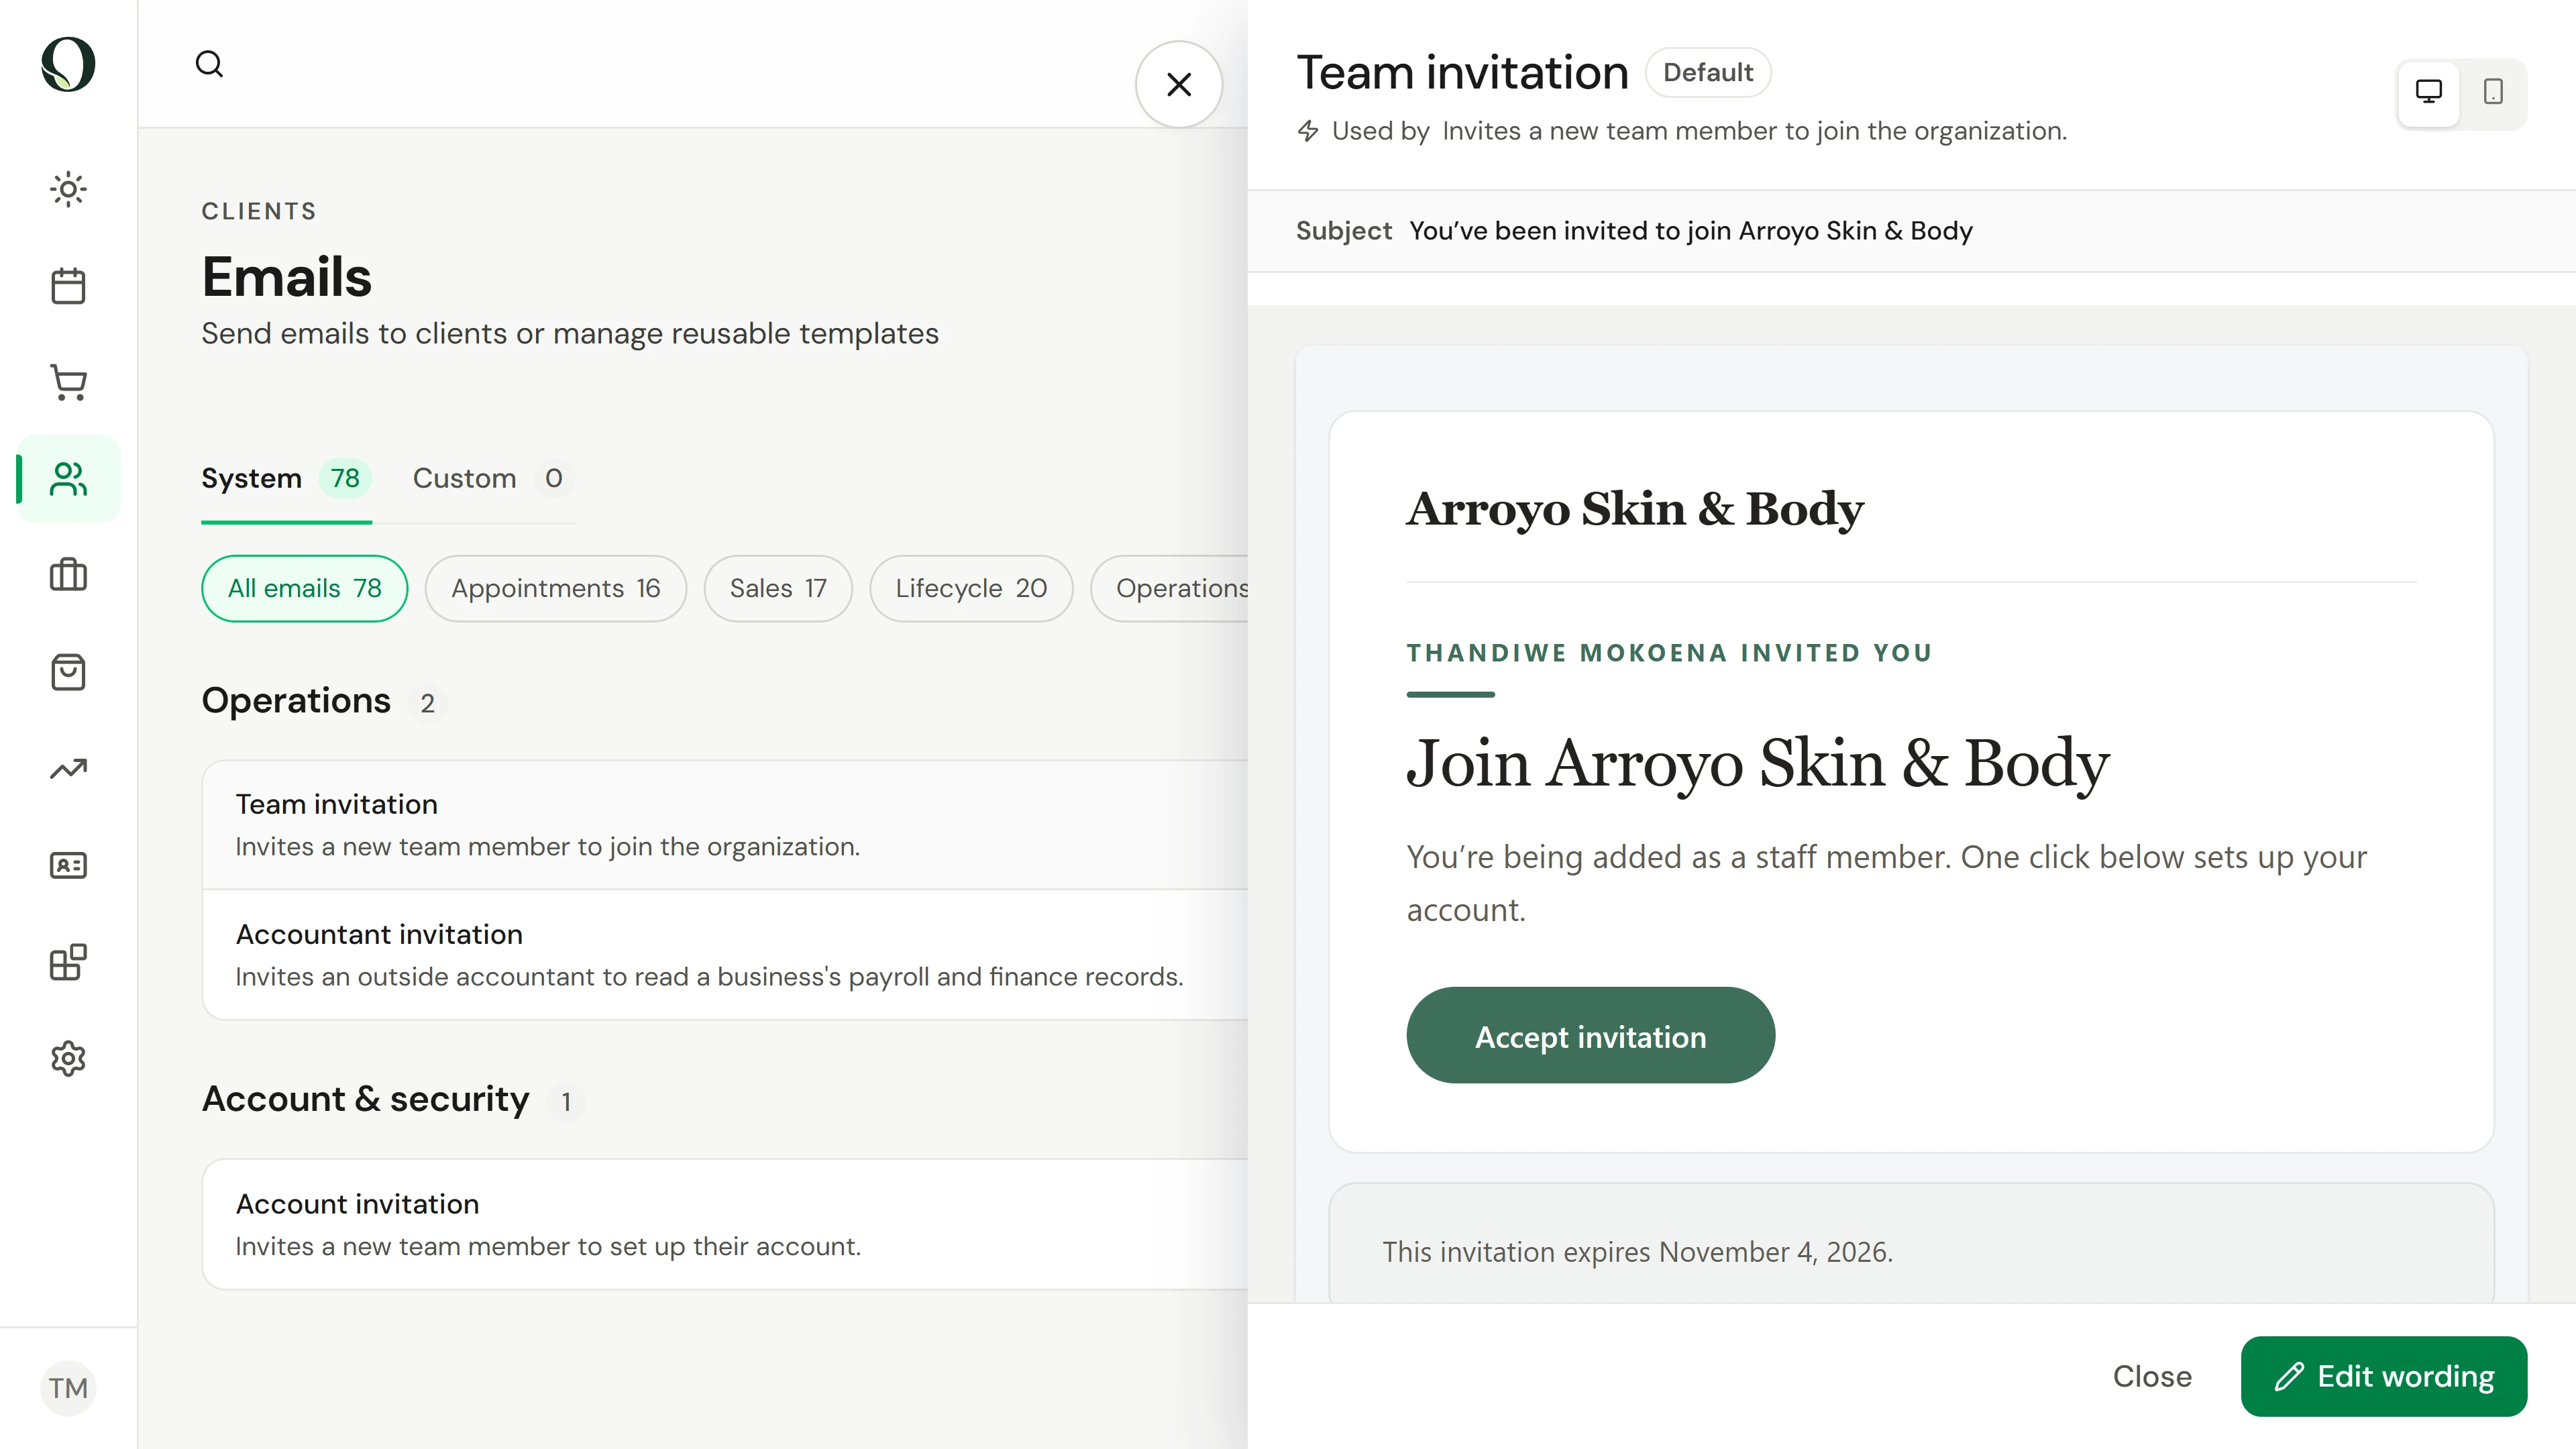
Under Clients, open Emails and find Team invitation. The preview shows the message with sample details: it comes from your business, names their role and has a button to accept. Edit wording changes the text.
Go deeper